Instant Pot Greek Yogurt
It all started when I wanted to make some recipe that involved a cup of Greek yogurt. Maybe it was a mac and cheese recipe, maybe it was some sort of other pasta dish, but whatever it was, it needed a larger quantity than we could get in a small tub. “That container cost $8,” said The Beard. “Please finish the container, don’t forget about it and let it go bad.” It was then that I rediscovered how much I like good yogurt.
Until then, I’d been eating the single serve containers of Greek yogurt for pretty much a year or, since I’d figured out that maybe, just maybe, eating fast food every day was a major contribition to being 125 lbs overweight. A few years ago I went on a kick of eating it with honey and wheat germ and bananas; after a month of that, I couldn’t physically handle it anymore. One afternoon, in the middle of lunch, I couldn’t even force myself to swallow another bite. I think maybe that’s what worried The Beard, that I’d have half a serving of this yogurt and then we’d have throw the rest out.
Now that I was spoiled with tasty yogurt that was completely customized, we decided since there was a wealth of information on the internet about how to make it in an Instant Pot, we’d try to make some at home. “Tart,” said a friend when I told her my plan, “you realize that you can buy that stuff in its own single serve containers, right?” Around here, a large tub will run us about $6/quart, which is only about four servings. Our logic was, if we try to make it and fail, we’re only out the cost of a gallon of milk. If we were successful, then we could probably get more yogurt for a better cost.
Our first experiment was… ok. I researched and read a lot of tutorials, cobbling together the directions that came up most often, mostly things like maximum and minimum temperatures, and cooking time. Our yogurt went for an 8-hour cooking cycle and used 1% milk. It turned out edible, but just barely could be considered yogurt. Even after straining it, the yogurt was very thin. We weren’t sure where we went wrong, but we chalked it up to having an inaccurate thermometer and not cooking it long enough. I threw out the entire batch. The next batch was better, and our third batch, which used 2% milk, was even better. After a few batches, I eventually found what I called my “sweet spot” for making it just how I like it.

The Tart’s Method of Making Yogurt
I start by sterilizing the Instant Pot. Pour ½ cup of water into the empty pot and seal it up, Make sure that the valve is closed, press the “Manual/Pressure Cook” button, and set the timer for 2 minutes. After the 2 minute pressure cycle, allow your pot to naturally release, then empty and dry out the pot with a clean paper towel.
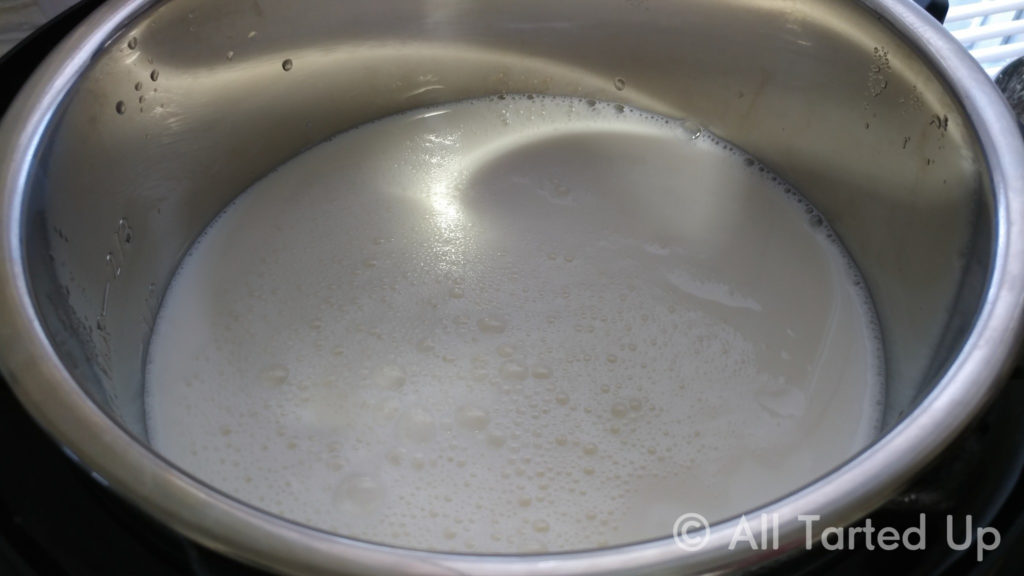
Next, pour the entire gallon of milk into the pot and cover it. It doesn’t matter if you use the lid that came with the pot, or one from a regular pot, you’re not using any pressure for the rest of the recipe so whatever fits is fine.
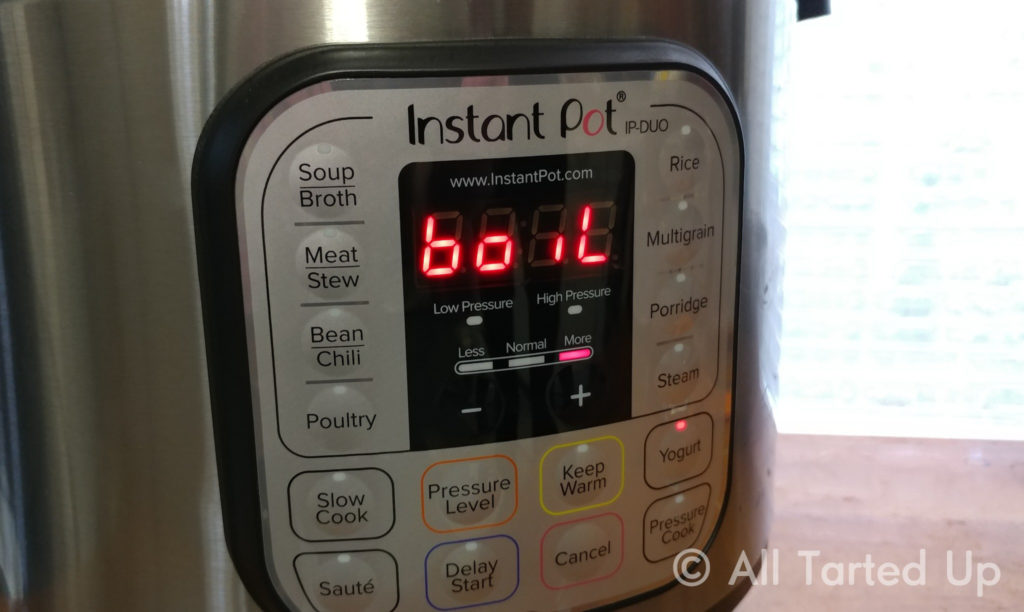
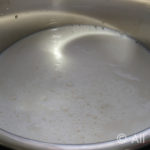
Now the real fun can begin! Press the “YOGURT” button on your Instant Pot until it reads “boil”, and it will begin heating the milk to the correct temperature. It should take roughly an hour for this step. I’ve found that I can get to the correct temperature quicker if I use the Instant Pot’s lid rather than another lid. After your Instant Pot beeps, whisk the milk a bit and check the temperature of it with an accurate thermometer. You want the milk to reach 180°F, and it may take extra boil cycles before it gets there (mine usually takes two cycles). Fortunately, the extra cycles don’t take much time, usually about an extra 10-15 minutes.
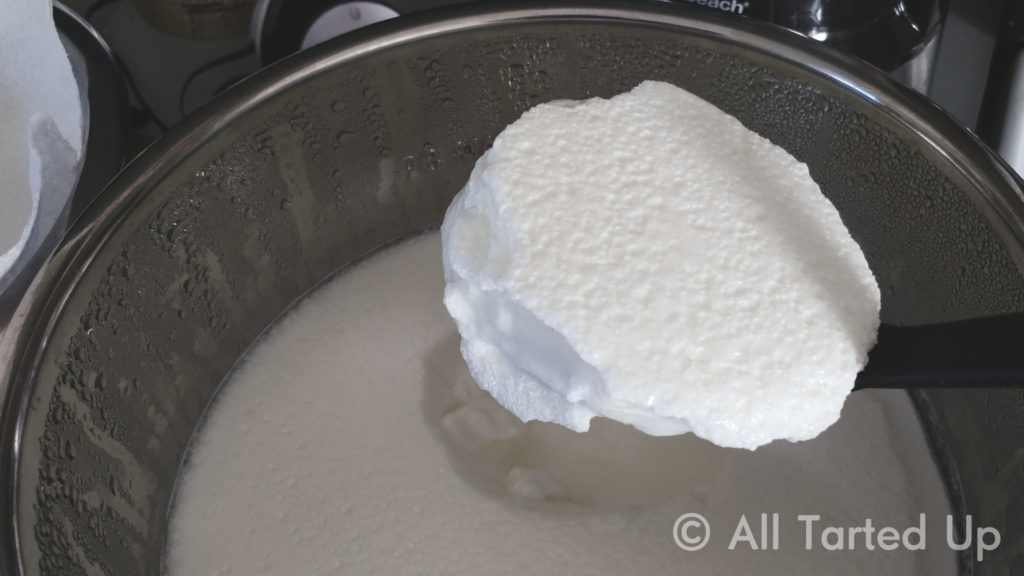
Once the milk has reached the proper temperature, it’s time to cool it off. You need to bring the temperature down to between 95-110°F. I usually set the covered inner pot in the sink and filling the sink with cold water, which usually takes about 15-20 minutes. If you have more patience than I do, you can let it cool on your counter, which takes about an hour or so from what I’ve been told. Return the inner pot to the Instant Pot base, and whisk in your starter.
A Note About Starters:
If this is your first time making yogurt, you’ll need to buy a cup of plain, unflavored yogurt, usually half of a single-serve cup of Chobani or Fage will do. It’s very important that you check the ingredients and make sure that it contains LIVE active cultures, otherwise your milk won’t turn into yogurt.
Replace the cover on your pot and press the YOGURT button again. This time, you should see a timer on the Instant Pot’s display, starting with 8:00. You can leave it at the default of 8 hours, or keep pressing the YOGURT button to increase the time by 30 minute intervals. The lower the time, the thinner your yogurt will be; inversely, the thickness and tartness of it will increase the longer you let it cook. Start with the 8 hours at first, and tweak the recipe to your liking as you make more. Note that the timer counts UP on this setting, not down like every other setting.
When It’s Done
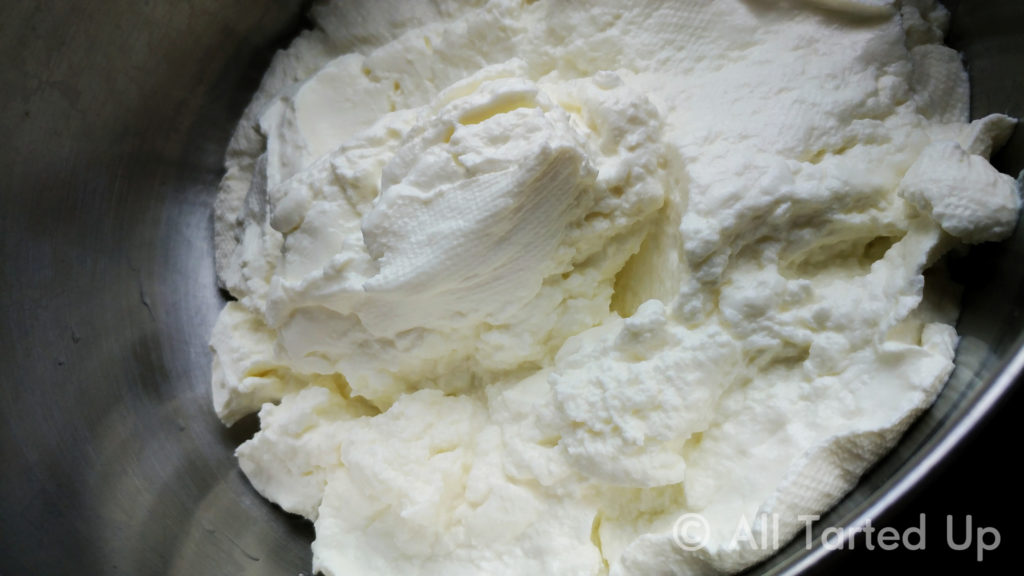
Remove the inner pot and put it in your fridge to cool. You can eat it at this point if you’d like, just stir it up to mix up the whey. If you prefer thicker, Greek-style yogurt, this is where you would start to strain it. Don’t try to strain it while it’s warm. The yogurt will be nicely set after about 4 hours and you can start the straining process.
You can buy a nut bag
If you plan to make more, save some of your current batch to use as a starter. You can freeze it, or just make another batch just before you run out of the current batch. Think of your yogurt like a sourdough.
The Tart’s “Sweet Spot”
I like my yogurt thick and tart. Like, really tart, and nearly the thickness of cream cheese. So here’s my preferred combination:
- Cook time: 14 hours
- Set time: 6 hours
- Strain time: 16+
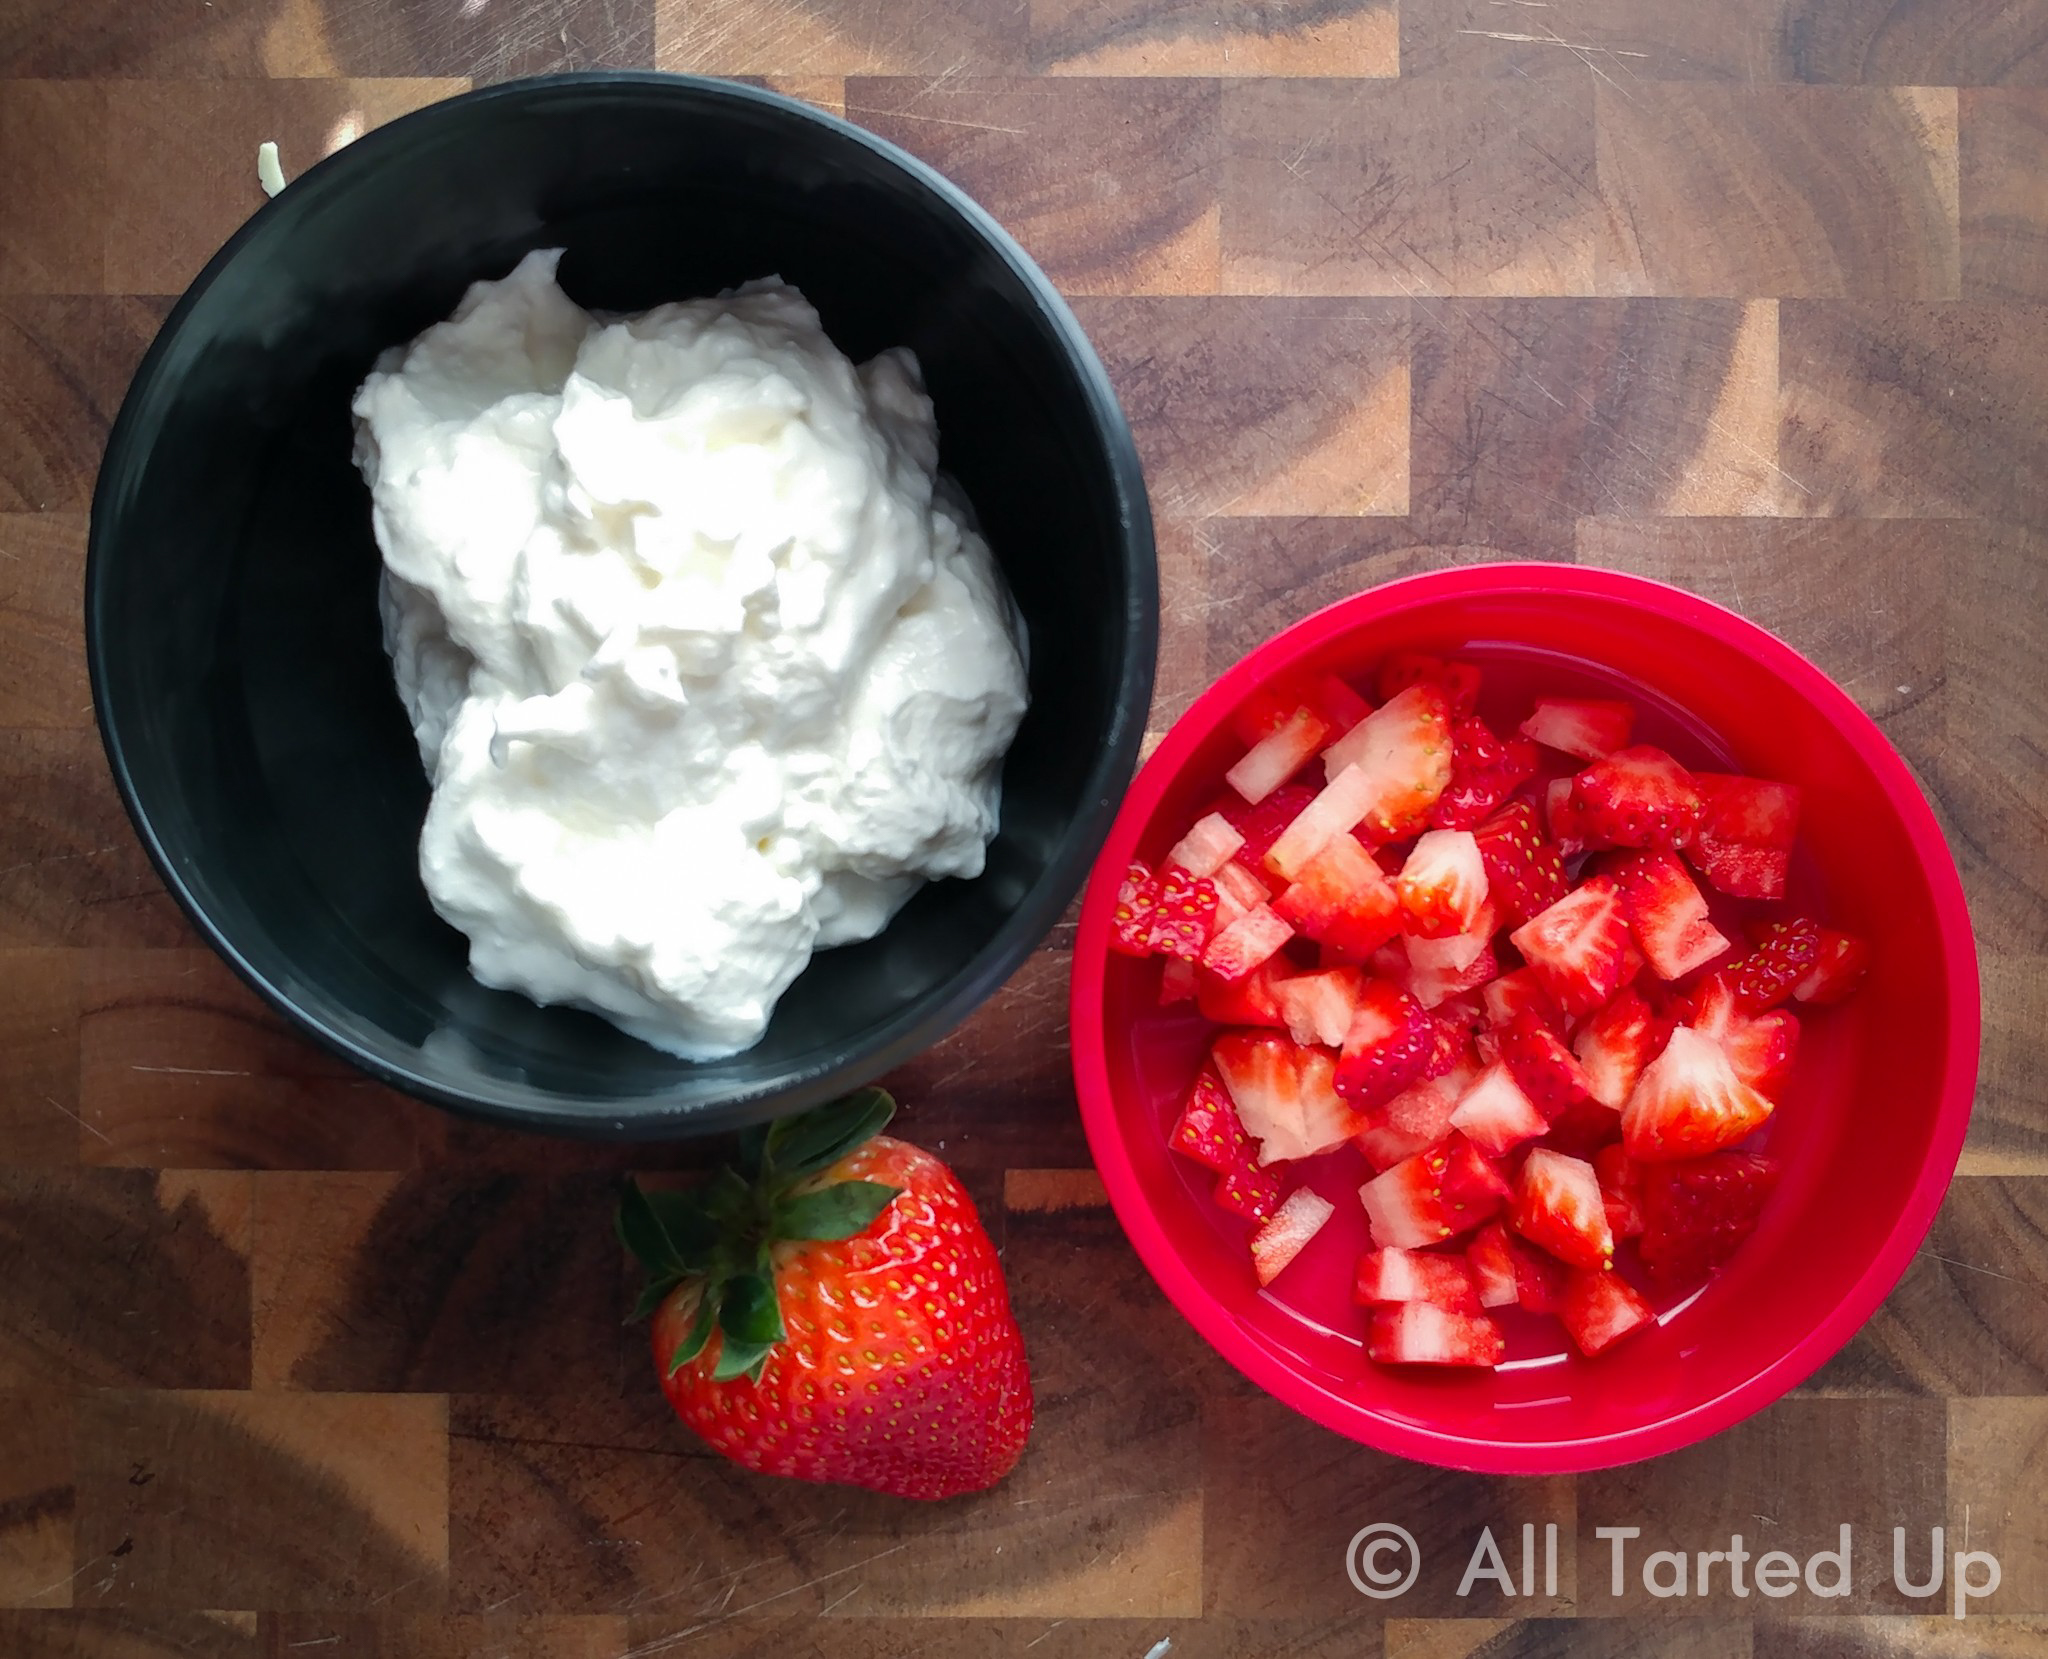
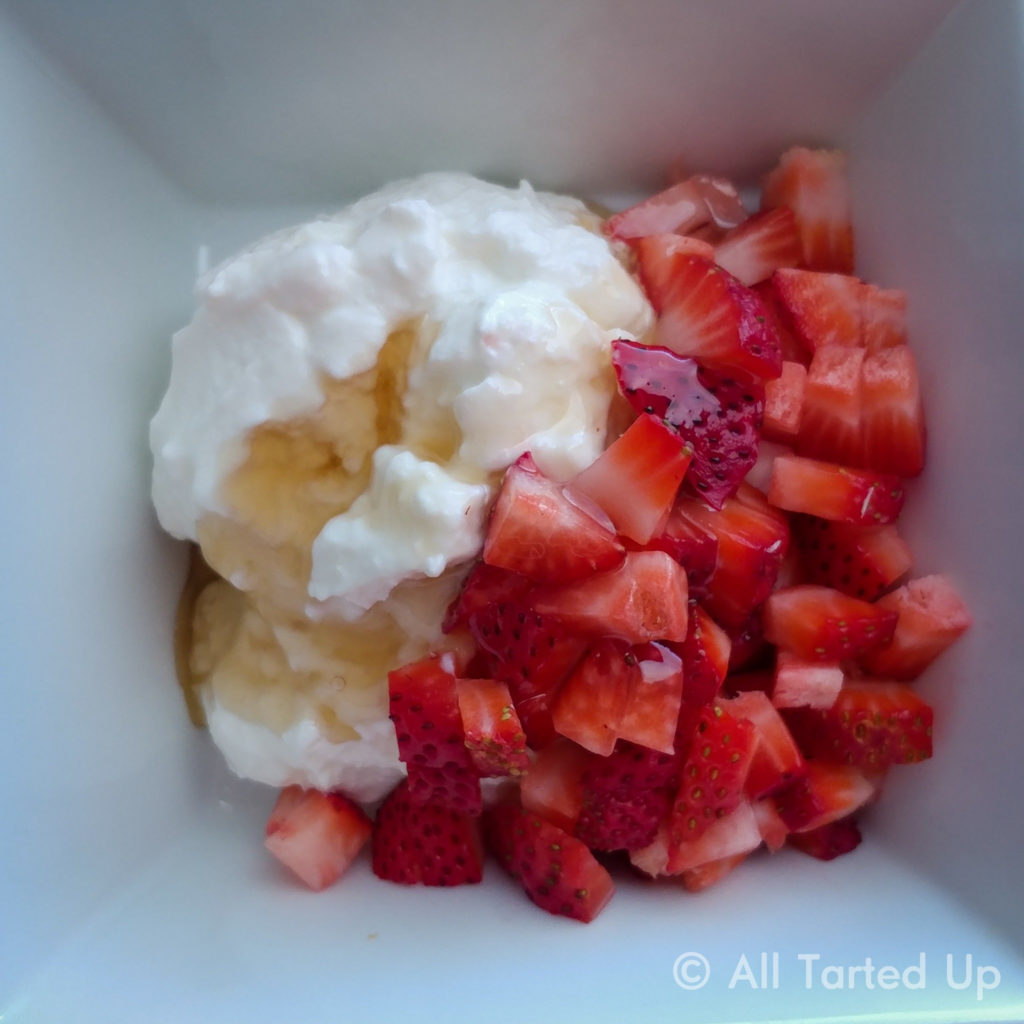
My typical lunch recipe is about 1 cup of yogurt mixed with 1 tbsp of agave nectar, and topped with some fruit. If you want a real treat, however, top it with some of my strawberry sauce, because the combination is just to die for.

Instant Pot Greek Yogurt
Thick and creamy, this easy recipe for making yogurt in your Instant Pot will have you wondering why you ever bought it from the store.
Ingredients
- 1 Gallon Milk I use 2%
- 1/4 cup Plain, unflavored yogurt with LIVE cutures
- 1/2 cup water
Instructions
The Prep
-
Sterilize your Instant Pot by pouring your 1/2 cup of water into the pot, then sealing it up. Make sure that the valve is close, then press the "Manual/Pressure Cook" button so that it reads 2 minutes. After it finishes the 2-minute cycle, let your Instant Pot naturally release pressure. Then, pour out the water and dry the basin with a clean paper towel.
-
Pour the entire gallon of milk into the pot and cover it. It doesn't matter if you close up the pressure valve or leave it open; you can also use the lid from a stove top pan or crock pot, if it fits.
-
Press the "YOGURT" button on your Instant Pot until it reads "BOIL". It will begin heating the milk to the appropriate temperature, which should take roughly an hour. After your Instant Pot beeps, check the temperature of your milk with a thermometer. The milk needs to reach 180°F. Repeat the boil cycle again if needed, which will be much shorter this time. Mine usually takes 2-3 cycles before it reaches the proper temp.

-
Once your milk has reached 180°F, it's time to cool it off. You can do this by letting the inner pot sit on your counter until it reaches somewhere between 95°-110°F. If you're in a hurry, you can set the inner pot in a sink full of cold water, which usually takes me about 15 minutes.
-
Return the inner pot to your Instant Pot and whisk in your yogurt starter. If you've bought one of those little single serve cups of Chobani or Fage or similar, use about half of the cup. Replace the cover on the pot, and press the YOGURT button again. This time, it will change to a time setting, starting with 8 hours (8:00). The lower the time, the thinner your yogurt will be at the end, and the longer it goes, the more "yogurty" it will taste. I've found that 14 hours is just right for me, yielding a thick, tart batch of yogurt. Note that the timer during a yogurt cycle counts up, not down.
-
After your Instant Pot has run through the complete yogurt cycle, remove the inner pot and set it to cool in your fridge for at least 4-6 hours. This will firm up the yogurt. I don't recommend trying to strain it right away.

-
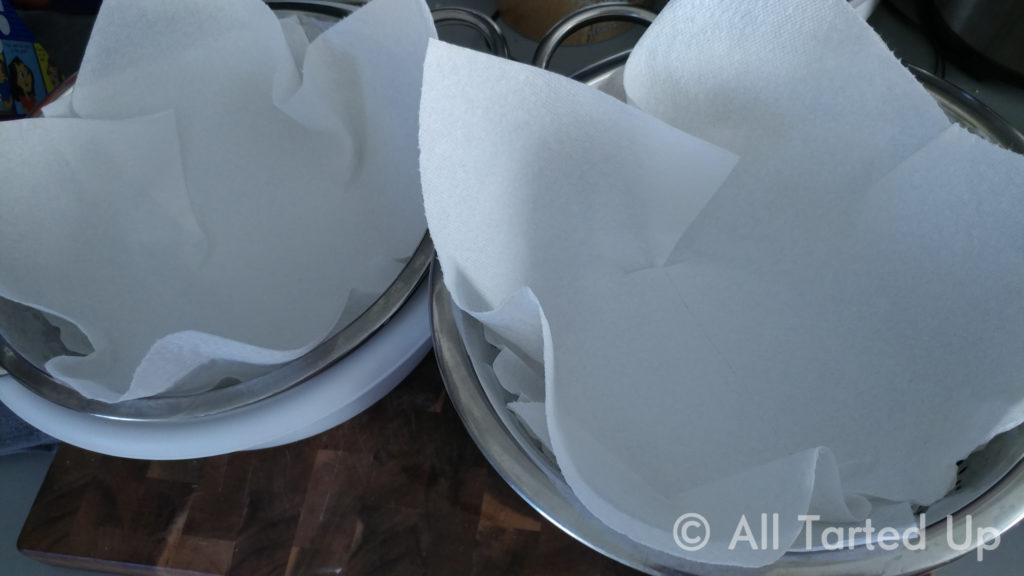
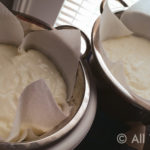
At this point, you can strain whey from the yogurt. Some people suggest using a nut bag to strain it, but I prefer to just line a couple of strainers with coffee filters and paper towels, and set the strainers in mixing bowls.

-
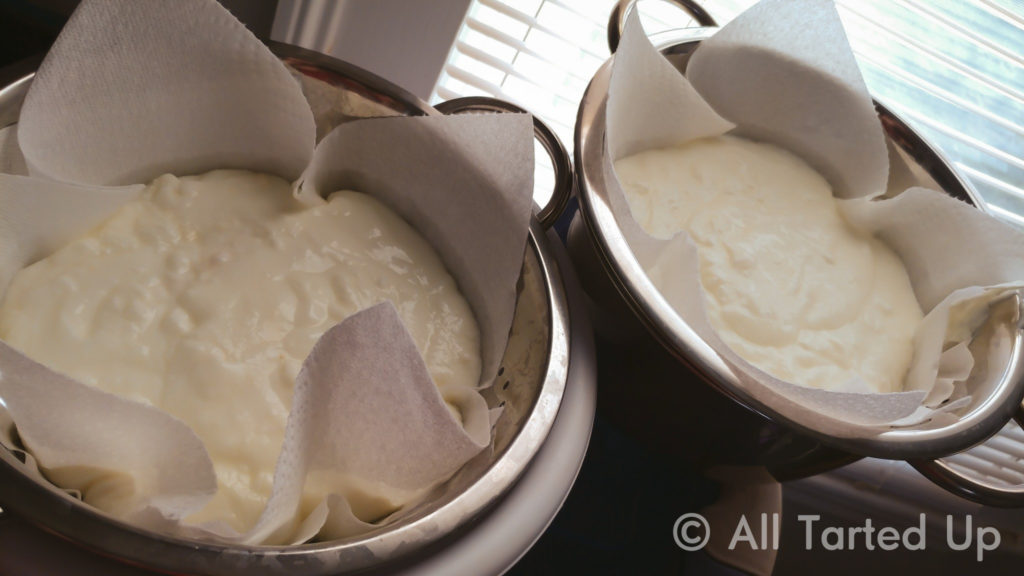
Use a ladle to spoon the yogurt out of the pot and into the strainers. Return the yogurt to your fridge, letting it strain until it has reached the desired thickness. One batch of yogurt will net me about three strainers' worth of strained yogurt, which is about 8 cups after I strain it. I've strained it for up to 24 hours, which yields a very thick, almost cream cheese-like yogurt, but 6-8 hours seems to be a pretty good start for your first batch.
The Tart likes to eat, cook, and bake things. She eats to work out, and she works out to be able to eat.